

cartographer+turtlebot+hokuyo|安装配置
系统:ubuntu 14.04+ros indigo 或 ubuntu 16.04+ros kinetic
平台:turtlebot2
传感器:hokuyo UTM-30LX laser
本文假设已经成功安装ubuntu,ros,以及各种与turtlebot相关的ros package等。本文主要介绍,怎么安装配cartographer+turtlebot+hokuyo,具体的包括安装cartographer, cartographer_ros, cartographer_turtlebot,以及在gazebo仿真环境中使用cartographer等。后续相关的工作会不定期往后续。
文章目录
cartographer+turtlebot+hokuyo|安装配置
- 1.安装cartographer,cartographer_ros,cartographer_turtlebot
-
- 1.1 cartographer+cartographer_ros
- 1.2 cartographer_turtlebot
- 2.测试数据集
-
- 2.1 cartographer_ros数据集
- 2.2 cartographer_turtlebot
- 3. turtlebot+hokuyo+cartographer in gazebo
-
- 3.1 turtlebot_gazebo仿真环境添加hokuyo
- 3.2 仿真环境+cartographer
-
-
- debug...
-
- 4. turtlebot+hokuyo+cartographer in real world
1.安装cartographer,cartographer_ros,cartographer_turtlebot
1.1 cartographer+cartographer_ros
从师弟那见识了cartographer在实际机器人上进行slam的效果后,马上回来学习学习。由于开始并不知道谷歌研究人员为了方便cartographer在turtlebot机器人上的应用,已经出了cartographer_turtlebot。所以开始我按照谷歌cartographer_ros官网的方式安装,一次性就成功了(打开了科学上网工具)。后来发现还有另一种流行的安装方式,我称之为民间方法,经过亲自测试,也是有效的。所以,本人测试,两种安装方式都是有效的。各自的优缺点列出如下:
-
谷歌官网安装
优点:类似于一键安装,所有的安装包都在一个工作空间,便于管理。
缺点:有些步骤需要科学上网(翻墙)才能成功。 -
民间安装方法
优点:每一步是分离开的,可控性更大,可以一个库一个库的安装。
缺点:基于的github源可能有点老,不知道作者更新了没。
大家可以任意选择一种尝试,不行换另一个就行。在安装过程中,会出现有些库很难安装成功,甚至找不到该库,这是因为ros的国内镜像源的问题,更换源就行了。本次安装,我换了好几次源(易科的、USTC、以及清华大学)。有些库在易科的源下面卡半天,但是换成在USTC源下面很顺利的就安装成功。这是我想强调给大家的,不要盲目的试,不是什么神秘的现象,是你的ros镜像源的问题。重点!!!!
1.2 cartographer_turtlebot
本人偿试了官网的安装方式,安装不成功。也试了git clone到本地再编译的方式也不成功。下面介绍自己在无数次失败后成功的安装方法。官网的安装方式的特点是,一键搞定。例如,在安装cartographer_ros时,会同时安装cartographer以及其它依赖包。而cartographer_turtlebot是同时依赖cartographer与cartographer_ros的,官网在安cartographer_turtlebot时会再次把cartographer,cartographer_ros,以及其它依赖包再次安装一遍,这是在用谷歌官网教程安装时要注意的。
他是向前包容的,也就是说,理想情况下,我只需要按装官网安装cartographer_turtlebot的方法,执行所有命令就可以了,并不需要提前单独装cartographer_ros,cartographer等。但是,我将安装好的cartographer与cartographer_ros工作空间删掉后,严格按照cartographer_turtlebot官网安装来了一遍,结果没有成功(还好,在删之前,我把工作空间都备份了,所以说备份很重要!!!)。
我本来已经放弃使用cartographer_turtlebot了,而是选择研究cartographer_turtlebot里面的launch文件、configuration_files里的文件来模仿它自己写配置文件。后来发现launch文件里只依赖一个cartographer_turtlebot包里生成的node,也就是说该包里只有一个node。于是,我自己建立工作空间,将这个节点.cc文件进行编译。后面还真成功了,下面给出详细的过程。
下面是我在已经安装好cartographer_ros的前提下,安装cartographer_turtlebot的方法。
1.构建ros工作空间
mkdir -p ~/cartographer_turtlebot_ws/src
cd ~/cartographer_turtlebot_ws/src
catkin_init_workspace
cd ..
catkin_make
注意:建立新的工作空间后,记得将source ~/cartographer_turtlebot_ws/devel/setup.bash添加到~/.bashrc文件中
2.建立新的pkg
cd ~/cartographer_turtlebot_ws/src
catkin_create_pkg cartographer_turtlebot
cd ..
catkin_make
3.将cartographer_turtlebot包 git clone到本地
cd ~/Download
git clone https://github.com/googlecartographer/cartographer_turtlebot
4.将~/Download/cartographer_turtlebot/cartographer_turtlebot文件夹下的三个子文件夹cartographer_turtlebot(当复制到目标文件夹后,改名为src),configuration_files,launch全部复制到~/cartographer_turtlebot_ws/src/cartographer_turtlebot。并将复制过来的子文件夹cartographer_turtlebot更名为src。此时的文件目录如下图所示

5.对~/cartographer_turtlebot_ws/src/cartographer_turtlebot/CMakeLists.txt文件进行修改,下面直接帖出修改后的文件内容,只需复制该内容替换原来的CMakeLists.txt文件即可。
cmake_minimum_required(VERSION 2.8.3)
project(cartographer_turtlebot)

# Compile as C++11
add_compile_options(-std=c++11)

set(PACKAGE_DEPENDENCIES
  roscpp
  roslib
  sensor_msgs
)

find_package(catkin REQUIRED COMPONENTS ${PACKAGE_DEPENDENCIES})
catkin_package(
)

include_directories(include ${catkin_INCLUDE_DIRS} ${PCL_INCLUDE_DIRS})
add_executable(cartographer_flat_world_imu_node "src/flat_world_imu_node_main.cc")
target_link_libraries(cartographer_flat_world_imu_node ${catkin_LIBRARIES})
add_dependencies(cartographer_flat_world_imu_node ${catkin_EXPORTED_TARGETS})
~/cartographer_turtlebot_ws/src/cartographer_turtlebot/package.xml先不做修改。
如果后面出了错误,可以偿试在该文件内容的<buildtool_depend>catkin</buildtool_depend>后面添加下面几行内容。
  <build_depend>sensor_msgs</build_depend>
  <build_export_depend>sensor_msgs</build_export_depend>
  <exec_depend>sensor_msgs</exec_depend>
6.编译工作空间
cd ~/cartographer_turtlebot_ws
catkin_make
不出意外,会编译完成。
2.测试数据集
2.1 cartographer_ros数据集
1.下载数据集
# Download the 2D backpack example bag.
wget -P ~/Downloads https://storage.googleapis.com/cartographer-public-data/bags/backpack_2d/cartographer_paper_deutsches_museum.bag
# Download the 3D backpack example bag.
wget -P ~/Downloads https://storage.googleapis.com/cartographer-public-data/bags/backpack_3d/with_intensities/b3-2016-04-05-14-14-00.bag
2.测试数据集
# Launch the 2D backpack demo.
roslaunch cartographer_ros demo_backpack_2d.launch bag_filename:=${HOME}/Downloads/cartographer_paper_deutsches_museum.bag
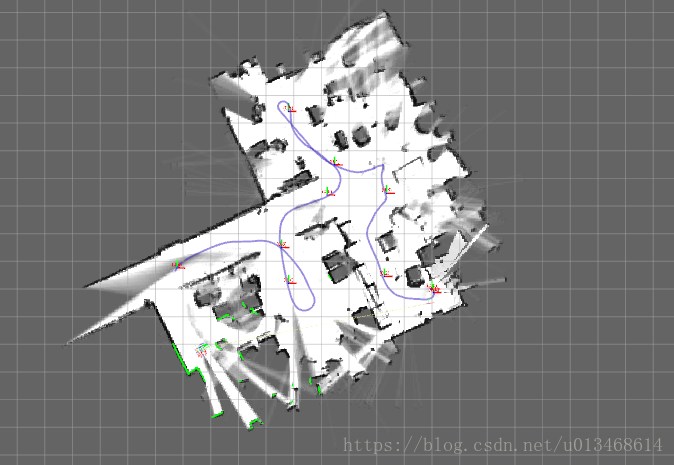
部分效果如下图所示:
# Launch the 3D backpack demo.
roslaunch cartographer_ros demo_backpack_3d.launch bag_filename:=${HOME}/Downloads/b3-2016-04-05-14-14-00.bag

数据太大9个G,就不跑了。
2.2 cartographer_turtlebot
- 1.下载测试数据集
# Download the example bag.
wget -P ~/Downloads https://storage.googleapis.com/cartographer-public-data/bags/turtlebot/cartographer_turtlebot_demo.bag
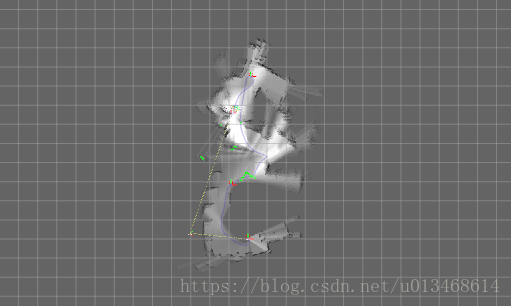
2.测试结果
# Launch the 2D LIDAR demo.
roslaunch cartographer_turtlebot demo_lidar_2d.launch bag_filename:=${HOME}/Downloads/cartographer_turtlebot_demo.bag
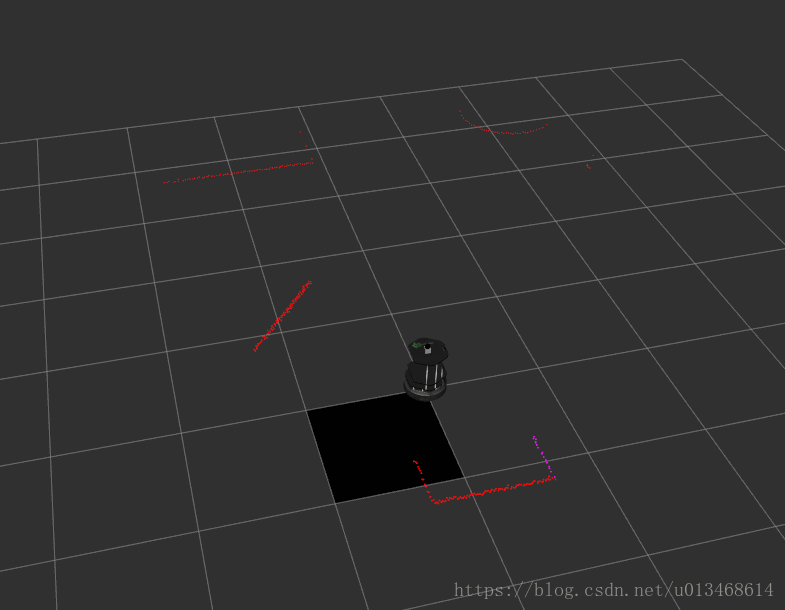
部分结果如下图所示:
# Launch the 2D depth camera demo.
roslaunch cartographer_turtlebot demo_depth_camera_2d.launch bag_filename:=${HOME}/Downloads/cartographer_turtlebot_demo.bag
部分结果如下图所示:
# Launch the 3D depth camera demo.
roslaunch cartographer_turtlebot demo_depth_camera_3d.launch bag_filename:=${HOME}/Downloads/cartographer_turtlebot_demo.bag
部分结果如下图所示:

这个应该是有点问题,不过cartographer_turtlebot肯定是安装成功了。
3. turtlebot+hokuyo+cartographer in gazebo
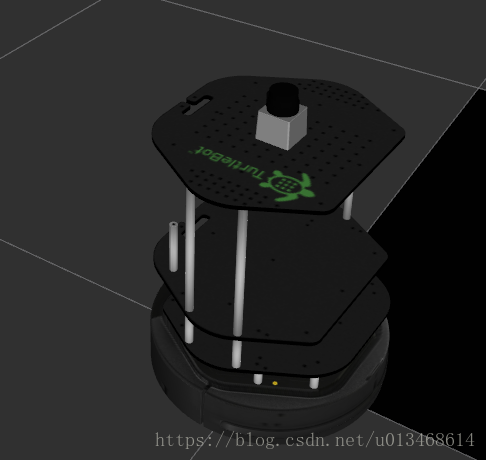
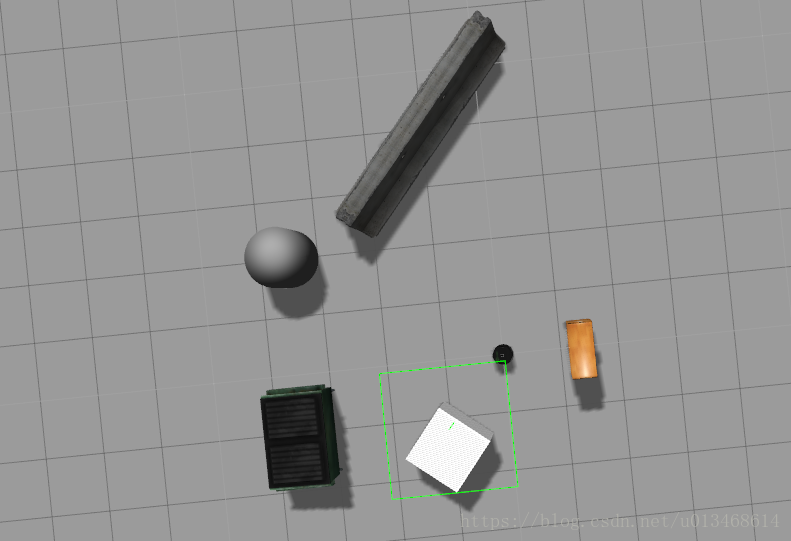
当实体机器人成本很高,而且不是很方便随处携带时,在仿真软件中进行机器人的研究不失一种很好的替代。在机器人仿真平台中,gazebo更是以其出色的物理引擎,以及与ros完全的接口,被广泛应用。本节主要介绍利用gazebo搭建立turtlebot+hokuyo的仿真环境,并且基于仿真数据实现cartographer的SLAM目的。
3.1 turtlebot_gazebo仿真环境添加hokuyo
由于turtlebot_gazebo包里的turtlebot默认的传感器是kinect,所以核心问题是怎么将kinect更换成hokuyo。该部分可以参照MaxChanger|CSDN博客,本人就是按照他一步一步配置,最后成功在gazebo中运行turtlebot+hokuyo,并能成功发布激光数据。所以,本篇就不重述整个配置过程,只对其中未讲明白的地方进行阐述。主要有以下三点:
1.CSDN博主RGiant在MaxChanger|CSDN博客的未尾评论的:“步骤3实际修改了3处,不要漏掉:
<sensor_hokuyo parent="base_link" />
2。MaxChanger|CSDN博客实际上配置的是turtlebot+kinect+hokuyo的过程。如果只是想用hokuyo替换掉kinect的话,可以将步骤中有关kinect的脚本从文件中删掉即可。具体地:步骤3中将kobuki_hexagons_hokuyo.urdf.xacro文件中第12,17注释掉;步骤6中将turtlebot_gazebo.urdf.xacro文件中4-41行注释掉。
3.MaxChanger|CSDN博客配置完的hokuyo激光视角FOV为 ![]() 。而我的hokuyo型号为UTM-30LX,FOV为 from −
。而我的hokuyo型号为UTM-30LX,FOV为 from −

而该设置与步骤6turtlebot_gazebo.urdf.xacro文件中第89、90行。
<min_angle>-1.570796</min_angle>
<max_angle>1.570796</max_angle>
更改为:
<!-- FOV from -3*pi/4 to 3*pi/4 -->
<min_angle>-2.356194</min_angle>
<max_angle>2.356194</max_angle>
配置中默认hokuyo安装在turtlebot的前额,如果想安装在正中间,可以将步骤5的第10行由:
<origin xyz="0.10 0 0.435" rpy="0 0.0 0.0" />
改为
<origin xyz="0.0 0 0.435" rpy="0 0.0 0.0" />
注意以上几点后,配置完成后,就可以修改环境变量:
gedit .bashrc
#在最后添加以下内容
#For gazebo
export  TURTLEBOT_BASE=kobuki
export  TURTLEBOT_STACKS=hexagons
export  TURTLEBOT_3D_SENSOR=hokuyo
之后运行,正常,激光有数据,话题/scan正常
source /opt/ros/indigo/setup.bash
roslaunch turtlebot_gazebo explorer.launch
roslaunch turtlebot_rviz_launchers view_navigation.launch
更改后的机器人turtlebot+激光hokuyo,注意此时Kinect已经不在机器人上了。
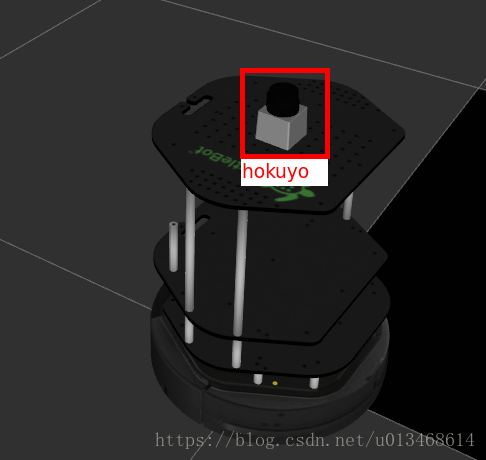
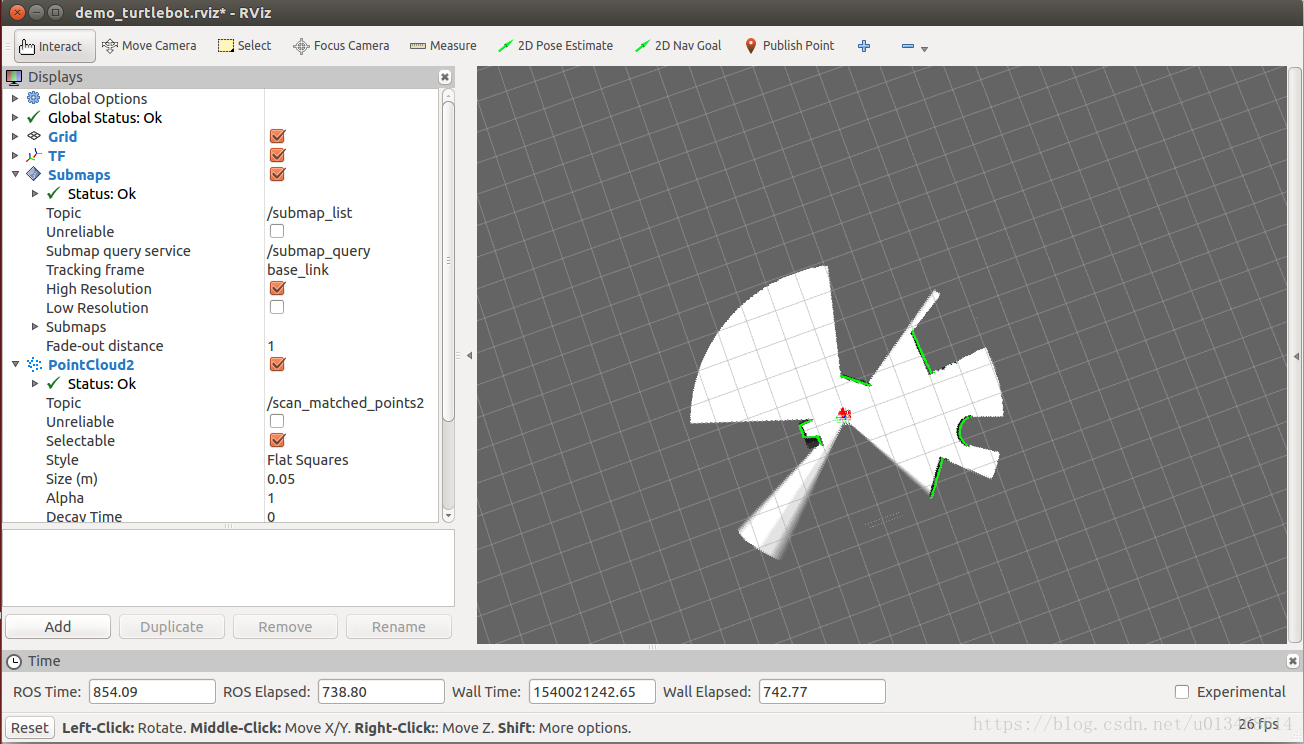
turtlebot+hokuyo在rviz中显示的:
turtlebot+hokuyo在gazebo中:
3.2 仿真环境+cartographer
在~/cartographer_turtlebot_ws/src/cartographer_turtlebot/launch文件夹下新建文件turltebot_hokuyo.launch,
<!-- turtlebot_hokuyo.launch -->
<launch>
  <param name="/use_sim_time" value="true" />

  <node name="cartographer_node" pkg="cartographer_ros"
      type="cartographer_node" args="
          -configuration_directory
              $(find cartographer_turtlebot)/configuration_files
          -configuration_basename turtlebot_hokuyo.lua"
      output="screen">
    <!--remap from="base_footprint" to="/base_link" /-->
    <!--remap from="scan" to="/laser_scan" /-->
  </node>

  <node name="flat_world_imu_node" pkg="cartographer_turtlebot"
      type="cartographer_flat_world_imu_node" output="screen">
    <!--remap from="imu_in" to="/mobile_base/sensors/imu_data_raw" /-->
    <remap from="imu_in" to="/mobile_base/sensors/imu_data" />
    <remap from="imu_out" to="/imu" />
  </node>

  <node name="rviz" pkg="rviz" type="rviz" required="true"
      args="-d $(find cartographer_turtlebot
          )/configuration_files/demo_turtlebot.rviz" />


  <node name="cartographer_occupancy_grid_node" pkg="cartographer_ros"
      type="cartographer_occupancy_grid_node" args="-resolution 0.05" />
</launch>
在~/cartographer_turtlebot_ws/src/cartographer_turtlebot/configuration_files文件夹下新建文件turltebot_hokuyo.lua
<!-- turtlebot_hokuyo.lua -->
include "map_builder.lua"
include "trajectory_builder.lua"

options = {
  map_builder = MAP_BUILDER,
  trajectory_builder = TRAJECTORY_BUILDER,
  map_frame = "map",
  tracking_frame = "gyro_link",
  published_frame = "odom",
  odom_frame = "odom",
  provide_odom_frame = false,
  publish_frame_projected_to_2d = false,
  use_odometry = true,
  use_nav_sat = false,
  use_landmarks = false,
  num_laser_scans = 1,
  num_multi_echo_laser_scans = 0,
  num_subdivisions_per_laser_scan = 1,
  num_point_clouds = 0,
  lookup_transform_timeout_sec = 0.2,
  submap_publish_period_sec = 0.3,
  pose_publish_period_sec = 5e-3,
  trajectory_publish_period_sec = 30e-3,
  rangefinder_sampling_ratio = 1.,
  odometry_sampling_ratio = 0.1,
  fixed_frame_pose_sampling_ratio = 1.,
  imu_sampling_ratio = 1.,
  landmarks_sampling_ratio = 1.,
}

MAP_BUILDER.use_trajectory_builder_2d = true

TRAJECTORY_BUILDER_2D.min_range = 0.1
TRAJECTORY_BUILDER_2D.max_range = 8.
TRAJECTORY_BUILDER_2D.missing_data_ray_length = 5.
TRAJECTORY_BUILDER_2D.use_imu_data = false
TRAJECTORY_BUILDER_2D.use_online_correlative_scan_matching = true
TRAJECTORY_BUILDER_2D.motion_filter.max_angle_radians = math.rad(0.1)

POSE_GRAPH.constraint_builder.min_score = 0.65
POSE_GRAPH.constraint_builder.global_localization_min_score = 0.7

return options
按照以上配置完成后,运行
source /opt/ros/indigo/setup.bash
roslaunch turtlebot_gazebo explorer.launch
roslaunch cartographer_turtlebot turtlebot_hokuyo.launch
gazebo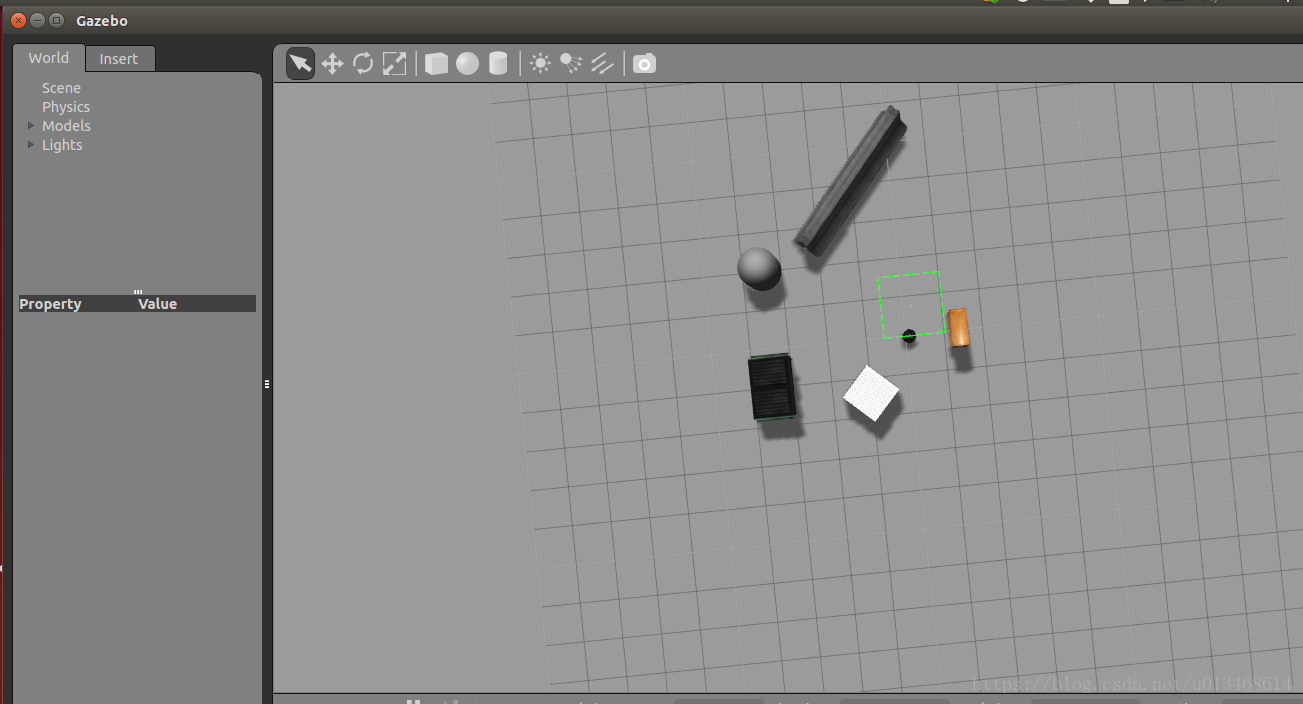
rviz
debug…
大家只需要按照以上过程配置即可,此处记录本人摸索过程遇到的问题,只为记录,大家可以忽略。
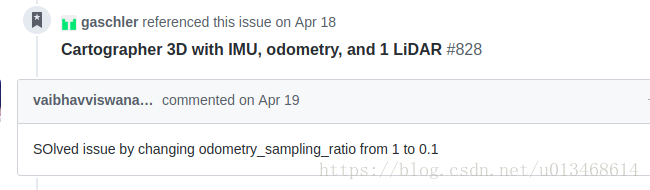
当我直接利用原始的turtlebot_urg_lidar_2d.lua文件时,出现错误map_by_time.h:43] Check failed: data.time > std::prev(trajectory.end())->first #831,相关问题及解答网址贴在此处以备查阅map_by_time.h:43,Check failed: data.time > std::prev(trajectory.end())->first #831
我采用这个人的方法,对.lua文件做对应改正后,运行就没问题了。
到目前,我们已经可以在gazebo仿真利用turtlebot+hokuyo与cartographer进行slam构建地图与定位。
4. turtlebot+hokuyo+cartographer in real world
如果在gazebo中跑通了turtlebot+hokuyo+cartographer,就可以经过一些修改应用于真实的turtlebot机器人。
1.安装配置hokuyo_node
如果ros是indigo版本,直接运行sudo apt-get install ros-indigo-hokuyo-node安装。如果是kinetic版本,需要从源安装。请先编译完driver_common后再git clone hokuyo_node,编译。
cd ~/cartographer_turtlebot_ws/src
git clone https://github.com/ros-drivers/driver_common.git
cd ..
catkin_make
cd ~/cartographer_turtlebot_ws/src
git clone git clone https://github.com/ros-drivers/hokuyo_node.git
cd ..
catkin_make
运行ls -l /dev/ttyACM0,如果报错,没有目标文件,则说明计算机没有配置ACM串口模块。对一般的PC应该不会出这种情况,我在英伟达的TX2上遇到过这种情况。解决方案请参照本人另一篇博客TX2 安装ttyACM串口驱动。
如果显示crw-rw-XX- 1 root dialout 166, 0 2009-10-27 14:18 /dev/ttyACM0,则正常,然后运行sudo chmod a+rw /dev/ttyACM0。
然后turtlebot连接hokuyo,运行
roscore
rosrun hokuyo_node hokuyo_node
查看是否发布激光数据
rostopic echo /scan
2.编定启动launch文件.
cd ~/cartograher_turtlebot_ws/src/cartographer_turtlebot/launch
gedit turtlebot_hokuyo_realworld.launch
<launch>
  <arg name="configuration_basename" />

  <include file="$(find turtlebot_bringup)/launch/minimal.launch" />
  <node name="hokuyo_node" pkg="hokuyo_node" type="hokuyo_node">
  	<param name="frame_id" value="hokuyo_link"/>
  </node>

  <node name="cartographer_node" pkg="cartographer_ros"
      type="cartographer_node" args="
          -configuration_directory
              $(find cartographer_turtlebot)/configuration_files
          -configuration_basename $(arg configuration_basename)"
      output="screen">
    <!--remap from="points2" to="/camera/depth/points" /-->
  </node>

  <node name="flat_world_imu_node" pkg="cartographer_turtlebot"
      type="cartographer_flat_world_imu_node" output="screen">
    <remap from="imu_in" to="/mobile_base/sensors/imu_data" />
    <remap from="imu_out" to="/imu" />
  </node>

  <node name="rviz" pkg="rviz" type="rviz" required="true"
      args="-d $(find cartographer_turtlebot
          )/configuration_files/demo_turtlebot.rviz" />

  <node name="cartographer_occupancy_grid_node" pkg="cartographer_ros"
      type="cartographer_occupancy_grid_node" args="-resolution 0.05" />
</launch>
运行roslaunch cartographer_turtlebot turtlebot_hokuyo_realworld.launch。
未完待续…


评论(0)
您还未登录,请登录后发表或查看评论