

在上篇文章中,我们在ubuntu上搭建了PX4的开发环境。本篇文章将继续开发环境的搭建,完成ROS+gazebo+Mavros的仿真环境搭建,其中mavros可以用来执行offboard控制。
!!!注意:
我的安装过程可能稍有不同,由于在这之前我就已经安装了ROS,而Gazebo则是在上一篇文章中已经安装,因此我在安装的时候没有直接使用安装脚本,而是将脚本逐行执行以避免问题。
如果你之前没有在home下创建过ros工作空间,那你应该直接运行脚本,而不用按照本篇文章的记录,以减少麻烦。
本篇文章分为以下几个部分:
mavros的安装offboard控制演示- 视频记录
1.mavros的安装
这部分的安装过程是按照官方连接(ROS/Gazebo)来进行的,下面的命令实际上是脚本中的命令逐行运行。
1. 检查系统版本
lsb_release -sc
bionic查看自己的输出是否为bionic,确认自己的版本是否是18.04,如果不是,请寻找针对特定版本的教程。
2. 安装仿真依赖项
wget https://raw.githubusercontent.com/PX4/Devguide/master/build_scripts/ubuntu_sim_common_deps.sh

./ubuntu_sim_common_deps.sh
如果下载下来的脚本不是可执行文件,运行
chmod +x ubuntu_sim_common_deps.sh
安装过程中查看是否输出了:
./ubuntu_sim_common_deps.sh: 行 47: * :语法错误:需要操作数
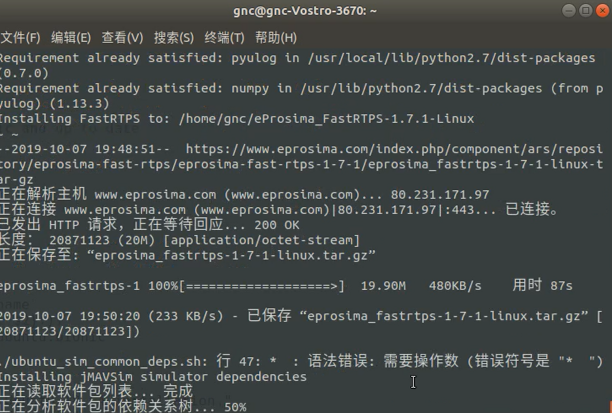
那么你需要自己运行下面的命令来安装fastrtps,虽然这个暂时也没看到有什么用。
进入home目录,运行
(cd eProsima_FastCDR-1.0.8-Linux && ./configure --libdir=/usr/lib && make -j4 && sudo make install)
(cd eProsima_FastRTPS-1.7.1-Linux && ./configure --libdir=/usr/lib && make -j4 && sudo make install)
来进行安装。
3. 安装ROS+Gazebo
sudo apt-get install protobuf-compiler libeigen3-dev libopencv-dev -y

# 安装的ROS+Gazebo
## ROS Gazebo: http://wiki.ros.org/melodic/Installation/Ubuntu
## Setup keys
sudo sh -c 'echo "deb http://packages.ros.org/ros/ubuntu $(lsb_release -sc) main" > /etc/apt/sources.list.d/ros-latest.list'
sudo apt-key adv --keyserver 'hkp://keyserver.ubuntu.com:80' --recv-key C1CF6E31E6BADE8868B172B4F42ED6FBAB17C654
## For keyserver connection problems substitute hkp://pgp.mit.edu:80 or hkp://keyserver.ubuntu.com:80 above.
sudo apt-get update
## Get ROS/Gazebo
sudo apt install ros-melodic-desktop-full -y
## Initialize rosdep
sudo rosdep init
rosdep update
## Setup environment variables
echo "source /opt/ros/melodic/setup.bash" >> ~/.bashrc;
source /opt/ros/melodic/setup.bash

## Install rosinstall and other dependencies
sudo apt install python-rosinstall python-rosinstall-generator python-wstool build-essential -y
4. 编译MAVROS
# MAVROS: https://dev.px4.io/en/ros/mavros_installation.html
## Install dependencies
sudo apt-get install python-catkin-tools python-rosinstall-generator -y

## Create catkin workspace
mkdir -p ~/catkin_ws/src
cd ~/catkin_ws
catkin init
wstool init src


## Install MAVLink
###we use the Kinetic reference for all ROS distros as it's not distro-specific and up to date
rosinstall_generator --rosdistro kinetic mavlink | tee /tmp/mavros.rosinstall

## Build MAVROS
### Get source (upstream - released)
rosinstall_generator --upstream mavros | tee -a /tmp/mavros.rosinstall

### Setup workspace & install deps
wstool merge -t src /tmp/mavros.rosinstall
wstool update -t src

rosdep install --from-paths src --ignore-src -y

wget https://raw.githubusercontent.com/mavlink/mavros/master/mavros/scripts/install_geographiclib_datasets.sh

./install_geographiclib_datasets.sh

catkin build

# source 空间
echo "source ~/catkin_ws/devel/setup.bash >> ~/.bashrc
source ~/catkin_ws/devel/setup.bash
2. offboard控制
打开官方MAVROS Offboard control example链接,然后在catkin_ws目录中,运行命令
catkin_create_pkg offboard_pkg roscpp std_msgs geometry_msgs mavros_msgs
然后定位到目录~/catkin_ws/src/offboard_pkg/src/,新建一个文件offboard_node.cpp。
将代码复制进去(官方示例):
/**
 * @file offb_node.cpp
 * @brief Offboard control example node, written with MAVROS version 0.19.x, PX4 Pro Flight
 * Stack and tested in Gazebo SITL
 */

#include <ros/ros.h>
#include <geometry_msgs/PoseStamped.h>
#include <mavros_msgs/CommandBool.h>
#include <mavros_msgs/SetMode.h>
#include <mavros_msgs/State.h>

mavros_msgs::State current_state;
void state_cb(const mavros_msgs::State::ConstPtr& msg){
    current_state = *msg;
}

int main(int argc, char **argv)
{
    ros::init(argc, argv, "offb_node");
    ros::NodeHandle nh;

    ros::Subscriber state_sub = nh.subscribe<mavros_msgs::State>
            ("mavros/state", 10, state_cb);
    ros::Publisher local_pos_pub = nh.advertise<geometry_msgs::PoseStamped>
            ("mavros/setpoint_position/local", 10);
    ros::ServiceClient arming_client = nh.serviceClient<mavros_msgs::CommandBool>
            ("mavros/cmd/arming");
    ros::ServiceClient set_mode_client = nh.serviceClient<mavros_msgs::SetMode>
            ("mavros/set_mode");

    //the setpoint publishing rate MUST be faster than 2Hz
    ros::Rate rate(20.0);

    // wait for FCU connection
    while(ros::ok() && !current_state.connected){
        ros::spinOnce();
        rate.sleep();
    }

    geometry_msgs::PoseStamped pose;
    pose.pose.position.x = 0;
    pose.pose.position.y = 0;
    pose.pose.position.z = 2;

    //send a few setpoints before starting
    for(int i = 100; ros::ok() && i > 0; --i){
        local_pos_pub.publish(pose);
        ros::spinOnce();
        rate.sleep();
    }

    mavros_msgs::SetMode offb_set_mode;
    offb_set_mode.request.custom_mode = "OFFBOARD";

    mavros_msgs::CommandBool arm_cmd;
    arm_cmd.request.value = true;

    ros::Time last_request = ros::Time::now();

    while(ros::ok()){
        if( current_state.mode != "OFFBOARD" &&
            (ros::Time::now() - last_request > ros::Duration(5.0))){
            if( set_mode_client.call(offb_set_mode) &&
                offb_set_mode.response.mode_sent){
                ROS_INFO("Offboard enabled");
            }
            last_request = ros::Time::now();
        } else {
            if( !current_state.armed &&
                (ros::Time::now() - last_request > ros::Duration(5.0))){
                if( arming_client.call(arm_cmd) &&
                    arm_cmd.response.success){
                    ROS_INFO("Vehicle armed");
                }
                last_request = ros::Time::now();
            }
        }

        local_pos_pub.publish(pose);

        ros::spinOnce();
        rate.sleep();
    }

    return 0;
}
然后打开目录~/catkin_ws/src/offboard_pkg/下的CMakeLists.txt添加下面的两行:
add_executable(offboard_node src/offboard_node.cpp)
target_link_libraries(offboard_node ${catkin_LIBRARIES})
然后到目录~/catkin_ws下,运行命令
catkin build
等待编译完成后,如果你要在gazebo中仿真,运行命令
make px4_sitl gazebo_iris
打开QGroundControl。
然后在终端下运行命令:
roslaunch mavros px4.launch fcu_url:="udp://:14540@127.0.0.1:14557"
启动PX4与Mavros之间的连接,然后运行命令
rosrun offboard_pkg offboard_node
然后进入gazebo中进行观察。
3. 视频记录
同时,我还将我的安装过程录制成了视频,请点击这里查看。**如果想看offboard控制的效果,可以直接看视频13:00处。


评论(0)
您还未登录,请登录后发表或查看评论