

前言
在目标检测领域,有两种方式,一种是two_stage 比如faster_rcnn mask_rcnn 还有一种是one_stage 比如 yolo 这两种的优缺点很容易看出来one_stage 速度非常快,适合做实时检测,但是精度不是很高,two_stage速度慢,效果好,本文使用torchvision中的 faster rcnn 训练 安全帽数据集。
一、faster_rcnn
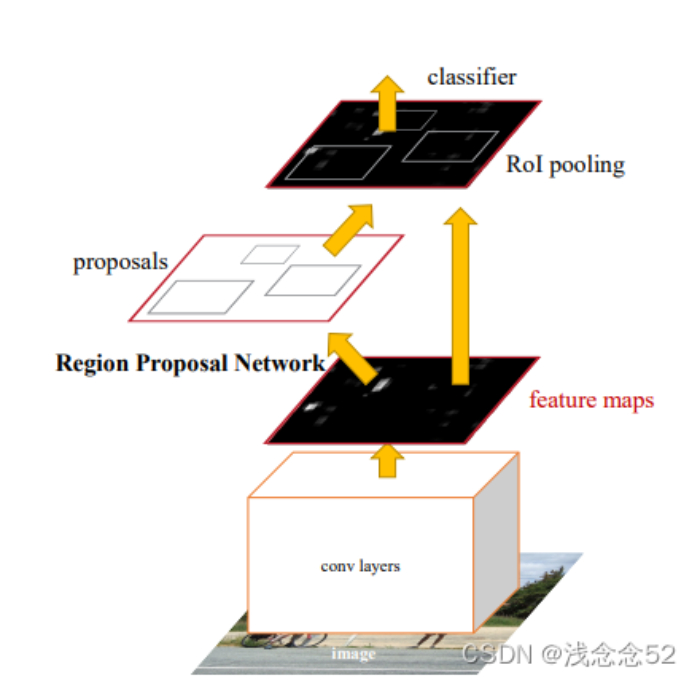
这是faster_rcnn网络结构,在这里简单说一下,输入图像经过主干网络提取特征,经过区域建议网络(RPN)得到候选框,候选框经过(ROI)resize到一个固定的尺寸,最后经过fc做分类与回归
二、数据处理
1.坐标跟标签
我们通过labelimg对图片就行标注,得到xml文件,我们要对xml文件进行处理,得到我们想要的结果
def parse_objects(xml_root):
    objects=xml_root.findall('object')

    size=xml_root.find('size')
    height=size.find('height').text
    width=size.find('width').text

    bndboxes=[]
    labels=[]

    for object in objects:
        bndbox=object.find('bndbox')
        if object.find('name').text=='hat':
            labels.append(1)
        else :
            labels.append(0)
        x_min=bndbox.find('xmin').text
        y_min = bndbox.find('ymin').text
        x_max = bndbox.find('xmax').text
        y_max = bndbox.find('ymax').text

        bndboxes.append((float(x_min)/float(width),float(y_min)/float(height),
                         float(x_max)/float(width),float(y_max)/float(height)))
    return bndboxes,labels
2.模型所需要的格式
我们得到的坐标跟标签不能直接输入到模型进行训练,要进行一些处理,首先存入到字典,最后存入到列表。
def parse_batch_xmls(batch_xml_files):
    targets=[]
    for xml_file in batch_xml_files:
        file_bndbox_info={}

        xmlparse=ET.parse(xml_file)
        xml_root=xmlparse.getroot()
        bnd_boxes,labels=parse_objects(xml_root)
        file_bndbox_info['boxes']=torch.tensor(bnd_boxes,dtype=torch.float32,device=gpu)
        file_bndbox_info['labels']=torch.tensor(labels,dtype=torch.int64,device=gpu)
        targets.append(file_bndbox_info)
    return targets
3.读取图像进行处理
这里到注意的是opencv不能直接读取中文路径下的图片,可以PIL进行读取,转换一下就可以了。
def read_batch_images(batch_files):
    batch_images=[]
    for file in batch_files:
        image=Image.open(file)
        image=image.convert('RGB')
        image=image.resize((512,512))
        image=np.transpose(image,(2,0,1)).astype(np.float32)/255.
        image=torch.tensor(image,device=gpu)
        batch_images.append(image)

    return batch_images
def conver_xml2jpg_file(jpg_dir,batch_xml_files):
    batch_files=[]
    for xml_file in batch_xml_files:
        basename=os.path.basename(xml_file)

        basename_jpg=basename.replace('.xml','.jpg')
        basename_png=basename.replace('.xml','.png')
        jpg_path=os.path.join(jpg_dir,basename_jpg)
        png_path=os.path.join(jpg_dir,basename_png)

        img_path=jpg_path if os.path.exists(jpg_path) else png_path
        assert  os.path.exists(img_path),"{0} not exist".format(img_path)
        batch_files.append(img_path)
    return batch_files
4.加载torchvision模型
model=torchvision.models.detection.fasterrcnn_resnet50_fpn(pretrained=False).to(device=gpu)
5.优化器
opt=torch.optim.Adam(model.parameters(),lr=1e-4,weight_decay=0.001)
6.获取xml文件列表
xmls_list=glob.glob(os.path.join(xml_path,'*.xml'))
7.训练网络
for epoch in range(epoches):

    for index in range(0,len(xmls_list),batchsize):

        batch_xml_files=xmls_list[index:index+batchsize]
        targets=parse_batch_xmls(batch_xml_files)
        batch_xml_files=conver_xml2jpg_file(jpg_path,batch_xml_files)
        images=read_batch_images(batch_xml_files)
        opt.zero_grad()
        torch.cuda.empty_cache()
        output=model(images,targets)
        loss=0
        for value in output.values():
            loss+=value
        loss.backward()
        opt.step()
        print('loss',loss.item())
8.保存模型
torch.save(model.state_dict(),'faster_RCNN_train.pth')
到这里代码部分就全部结束了
三.服务器运行
1.我们的电脑无法支持海量数据的深度学习的训练,所以这里要使用到服务器,本文使用的服务器是矩池云,附链接:https://www.matpay.net/
2.我们需要配置服务器环境,这个平台有一个好处就是有配置好的深度学习环境,可以直接进行使用,可以说很方便。
3.pycharm连接服务器
选择ssh解释器,输入主机名,端口,用户名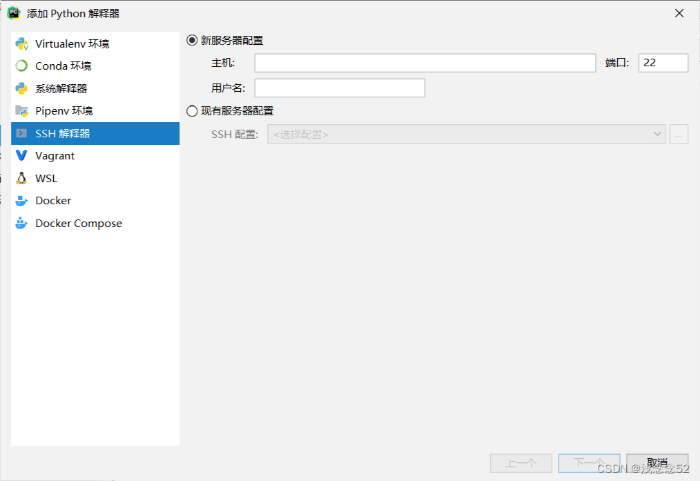
下一步,输入密码
之后配置服务器环境路径
下图,是配置好的结果
到这里,服务器就配置完成了。
代码会自动上传,这里要注意更改代码数据集路径
下图是服务器数据集路径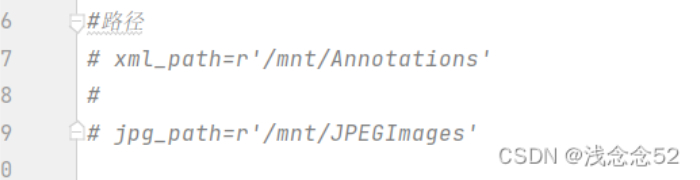
最后直接运行就可以了。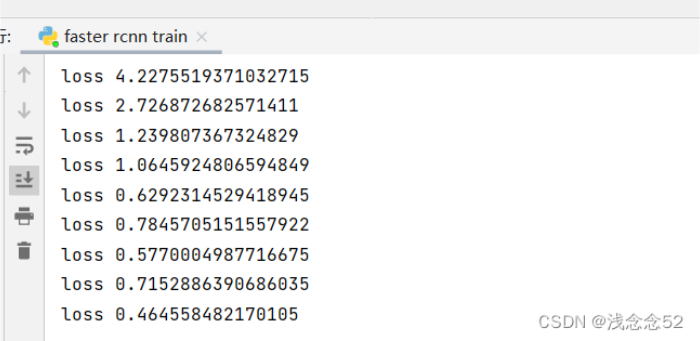
可以查看服务器的使用情况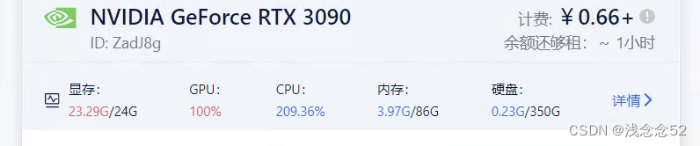
总结
本文只是简单介绍了通过torchvision加载faster_rcnn 模型进行自己数据集的训练,然后搭载服务器上运行,得到我们想要的模型,进行测试。觉得本文对自己有帮助的,可以三连支持一波!


评论(0)
您还未登录,请登录后发表或查看评论