前言
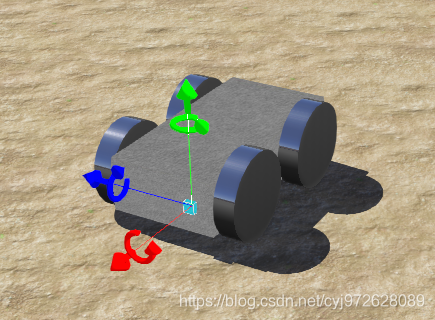
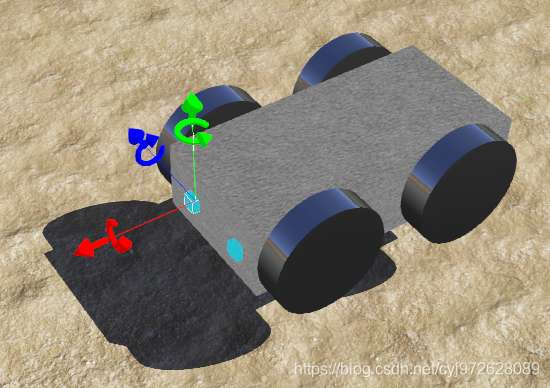
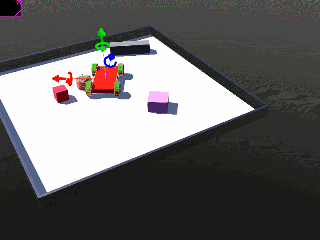
本次项目所用到的四轮小车模型如下
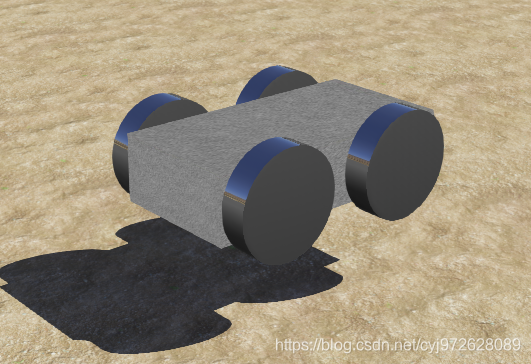
该四轮小车的模型搭建过程请阅读我的上一篇文章:
https://blog.csdn.net/cyj972628089/article/details/107009528(Webots学习笔记—四轮小车的模型搭建和简单控制)
距离传感器的介绍
本项目用到的是Base nodes下的DistanceSensor节点,关于这个节点的详细介绍请大家自行查阅文档Reference Manual,这里我们只做一个与本项目有关的简单介绍。
首先我们查阅官方文档,看看DistanceSensor是什么
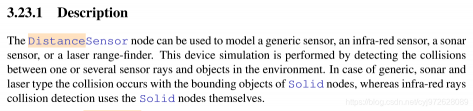
可见通过修改节点的相关属性,可以模拟通用传感器、红外传感器、声纳传感器或激光测距仪四种。本项目中我们使用的是最简单的通用传感器。通过这个表格可以看出,通用传感器可以计算出射线的平均距离。

于是我们就可以根据通用传感器返回的值,来判断小车和障碍物之间的距离。传感器发射的射线最长对应的值为1000,当射线长度减小时返回值也开始减小(即小车离障碍越来越近),于是我们可以设置一个阈值当传感器的返回值小于某个值时,让小车转弯。
添加距离传感器
在Robots节点下的children属性中添加一个DistanceSensor节点
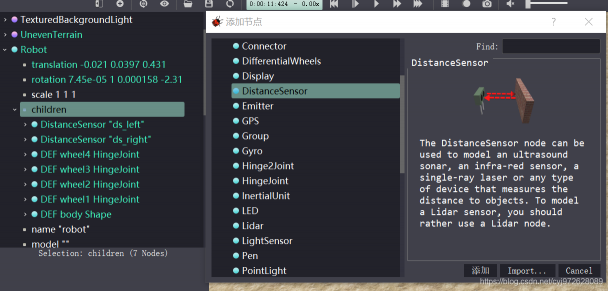
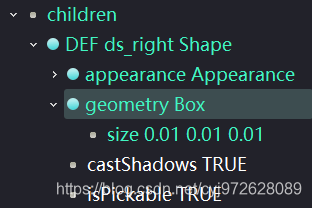
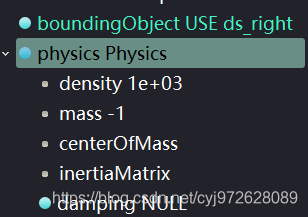
在DistanceSensor节点下的children属性中添加一个Shape节点,设置geometry为Box,大小为0.01×0.01×0.01。修改Shape名字为ds_right,并添加碰撞属性和物理系数
修改这个DistanceSensor的名字为ds_right,并且修改它的translation和rotation
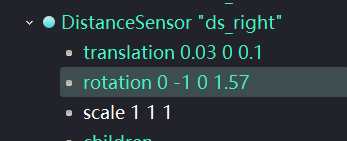
修改translation是为了修改传感器的位置,修改rotation是为了使传感器的x轴也就是红色轴指向前方,这样才能实现距离测量
这样我们第一个距离传感器就添加完成了,复制这个DistanceSensor,修改translation的值,并将新的传感器命名为ds_left。至此,我们的距离传感器就添加完毕了
小车避障代码实现
/*
 * File:          control.c
 * Date:
 * Description:
 * Author:
 * Modifications:
 */

/*
 * You may need to add include files like <webots/distance_sensor.h> or
 * <webots/motor.h>, etc.
 */
#include <webots/robot.h>
#include <webots/motor.h>
#include <webots/distance_sensor.h>

/*
 * You may want to add macros here.
 */
#define TIME_STEP 64

/*
 * This is the main program.
 * The arguments of the main function can be specified by the
 * "controllerArgs" field of the Robot node
 */

int main(int argc, char **argv) {
  /* necessary to initialize webots stuff */
  wb_robot_init();
  /*
   * You should declare here WbDeviceTag variables for storing
   * robot devices like this:
   *  WbDeviceTag my_sensor = wb_robot_get_device("my_sensor");
   *  WbDeviceTag my_actuator = wb_robot_get_device("my_actuator");
   */
     int i=0;
     int avoid_obstacle_counter = 0;

     WbDeviceTag ds[2];
  char ds_names[2][10] = {"ds_left", "ds_right"};
  for (i = 0; i < 2; i++) {
    ds[i] = wb_robot_get_device(ds_names[i]);
    wb_distance_sensor_enable(ds[i], TIME_STEP);
  }

     WbDeviceTag motors[4];
  char motors_names[4][8] = {"wheel1", "wheel2", "wheel3", "wheel4"};
  for (i = 0; i < 4; i++) {
    motors[i] = wb_robot_get_device(motors_names[i]);
    wb_motor_set_position(motors[i], INFINITY);
    wb_motor_set_velocity(motors[i],0);
  }

  /* main loop
   * Perform simulation steps of TIME_STEP milliseconds
   * and leave the loop when the simulation is over
   */
  while (wb_robot_step(TIME_STEP) != -1) {
    /*
     * Read the sensors :
     * Enter here functions to read sensor data, like:
     *  double val = wb_distance_sensor_get_value(my_sensor);
     */
    double left_speed = 2.0;
    double right_speed = 2.0;
    /* Process sensor data here */
    if (avoid_obstacle_counter > 0) {
      avoid_obstacle_counter--;
      left_speed = 1.0;
      right_speed = -1.0;
    } else {
      // read sensors outputs
      double ds_values[2];
      for (i = 0; i < 2; i++)
        ds_values[i] = wb_distance_sensor_get_value(ds[i]);

      // increase counter in case of obstacle
      if (ds_values[0] < 1000.0 || ds_values[1] < 1000.0)
        avoid_obstacle_counter = 100;
    }

    wb_motor_set_velocity(motors[0],left_speed);
    wb_motor_set_velocity(motors[1],right_speed);
    wb_motor_set_velocity(motors[2],left_speed);
    wb_motor_set_velocity(motors[3],right_speed);
    /*
     * Enter here functions to send actuator commands, like:
     * wb_motor_set_position(my_actuator, 10.0);
     */
  };

  /* Enter your cleanup code here */

  /* This is necessary to cleanup webots resources */
  wb_robot_cleanup();

  return 0;
}
添加这段代码到控制器,再在小车前方随便放置一个物体,点击运行,就会发现小车在靠近障碍一段距离后开始转弯。至此,我们就实现了四轮小车避障!
(我不知道如何制作gif,于是我找了一个别人做的给大家看看效果,我们最终也是实现这个效果)
写在最后
这次我们简单介绍了距离传感器并且实现了四轮小车的避障,下次我将给大家讲解如何使用键盘控制小车的前进、后退、转弯等!希望大家多多支持!


")


评论(0)
您还未登录,请登录后发表或查看评论