
MASKRCNN识别水坑并标记出mask 蒙版来,然后让机器人在行驶过程中避免进入水坑,对于某些特殊场景,专门检测水坑
并避免驶入也是非常重要的。
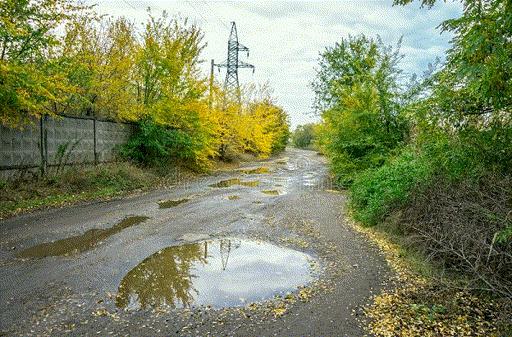
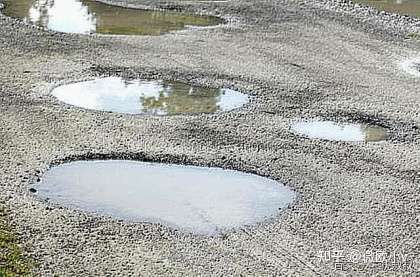
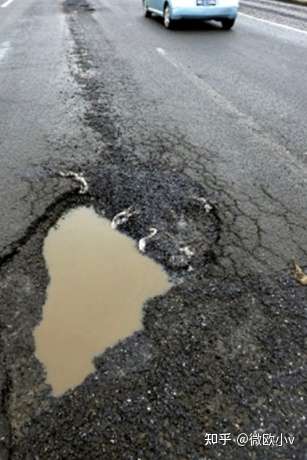
文章的内容是构建一个自定义的 Mask R-CNN 模型,该模型可以检测道路上水坑区域(参见 图像示例)。实际上可以利用图像分割做好多事情,如果机器人在行驶的过程中有针对性的检测水坑然后绕过水坑行驶,以免水坑太深没过机器人。
目录
- 如何构建用于道路水坑的 Mask R-CNN
- 收集数据
- 注释数据
- 训练模型
- 验证模型
- 运行图像模型并进行预测
- 感谢
如何构建用于道路水坑检测的 Mask R-CNN 模型
为了构建自定义 Mask R-CNN,我们将利用 Matterport Github ,地址 https://github.com/matterport/Mask_RCNN
MASKRCNN的搭建具有一定的挑战,请按照GitHub上的说明进行搭建。MASK RCNN 是基于TensorFlow 的python3版本。 还好最终搭建成功Mask R-CNN 。
收集数据
在这个练习中,我从百度收集了 66 张水坑图像(然后经过图像镜像,颠倒,旋转角度等处理增加到120张。查看下面的一些示例。
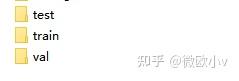
三个文件夹,数量按训练和验证按8:2 分配。
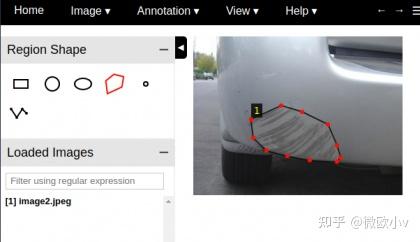
注释数据
Mask R-CNN 模型要求用户注释图像并识别水坑区域。本教程使用的注释工具依旧是 VGG Image Annotator — v 1.0.6。您可以使用此链接 :http://www.robots.ox.ac.uk/~vgg/software/via/via-1.0.6.html 提供的 html 版本 。使用此工具,您可以创建多边形遮罩,如下所示:
创建完所有注释后,您可以下载注释并将其保存为json格式。这里不同于LABELME的是 只生成一个json文本。
train文件加中生成的标注文件。labelme 也可用于标注。

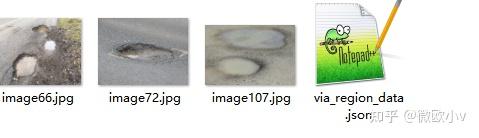
上图中 via_region_data.json是验证集生成的标注文件。
训练模型
训练的python源码参考balloon.py修改的。训练中用到了 coco的H5模型。
训练指令
python3 custom_roadwater.py train --dataset=customImages/ --weights=coco

我正在使用 CPU 并在 100个steps 10个epoches需要花费14个小时,建议有条件的用GPU。

custom_roadwater.py
"""
Mask R-CNN
Train on the toy Balloon dataset and implement color splash effect.
Copyright (c) 2018 Matterport, Inc.
Licensed under the MIT License (see LICENSE for details)
Written by Waleed Abdulla
------------------------------------------------------------
Usage: import the module (see Jupyter notebooks for examples), or run from
       the command line as such:
    # Train a new model starting from pre-trained COCO weights
    python3 balloon.py train --dataset=/path/to/balloon/dataset --weights=coco
    # Resume training a model that you had trained earlier
    python3 balloon.py train --dataset=/path/to/balloon/dataset --weights=last
    # Train a new model starting from ImageNet weights
    python3 balloon.py train --dataset=/path/to/balloon/dataset --weights=imagenet
    # Apply color splash to an image
    python3 balloon.py splash --weights=/path/to/weights/file.h5 --image=<URL or path to file>
    # Apply color splash to video using the last weights you trained
    python3 balloon.py splash --weights=last --video=<URL or path to file>
"""
import os
import sys
import json
import datetime
import numpy as np
import skimage.draw
import cv2
from mrcnn import visualize
from mrcnn.visualize import display_instances
import matplotlib.pyplot as plt
# Root directory of the project
ROOT_DIR =  os.getcwd()
# Import Mask RCNN
sys.path.append(ROOT_DIR) # To find local version of the library
from mrcnn.config import Config
from mrcnn import model as modellib, utils
# Path to trained weights file
COCO_WEIGHTS_PATH = os.path.join(ROOT_DIR, "mask_rcnn_coco.h5")
# Directory to save logs and model checkpoints, if not provided
# through the command line argument --logs
DEFAULT_LOGS_DIR = os.path.join(ROOT_DIR, "logs")
############################################################
#  Configurations
############################################################
class CustomConfig(Config):
 """Configuration for training on the toy  dataset.
    Derives from the base Config class and overrides some values.
    """
 # Give the configuration a recognizable name
    NAME = "water"
 # We use a GPU with 12GB memory, which can fit two images.
 # Adjust down if you use a smaller GPU.
    IMAGES_PER_GPU = 1
    BACKBONE = "resnet50"
 # Number of classes (including background)
    NUM_CLASSES = 1 + 1 # Background + toy
    RPN_ANCHOR_SCALES = (8*5, 16*5, 32*5, 64*5, 128*5) # anchor side in pixels
 # Number of training steps per epoch
    STEPS_PER_EPOCH = 100
 # Skip detections with < 90% confidence
    DETECTION_MIN_CONFIDENCE = 0.95
    DETECTION_NMS_THRESHOLD = 0.2
############################################################
#  Dataset
############################################################
class CustomDataset(utils.Dataset):
def load_custom(self, dataset_dir, subset):
 """Load a subset of the Balloon dataset.
        dataset_dir: Root directory of the dataset.
        subset: Subset to load: train or val
        """
 # Add classes. We have only one class to add.
        self.add_class("water", 1, "water")
 # Train or validation dataset?
assert subset in ["train", "val"]
        dataset_dir = os.path.join(dataset_dir, subset)
 # Load annotations
 # VGG Image Annotator saves each image in the form:
 # { 'filename': '28503151_5b5b7ec140_b.jpg',
 #   'regions': {
 #       '0': {
 #           'region_attributes': {},
 #           'shape_attributes': {
 #               'all_points_x': [...],
 #               'all_points_y': [...],
 #               'name': 'polygon'}},
 #       ... more regions ...
 #   },
 #   'size': 100202
 # }
 # We mostly care about the x and y coordinates of each region
        annotations1 = json.load(open(os.path.join(dataset_dir, "via_region_data.json")))
 # print(annotations1)
        annotations = list(annotations1.values()) # don't need the dict keys
 # The VIA tool saves images in the JSON even if they don't have any
 # annotations. Skip unannotated images.
        annotations = [a for a in annotations if a['regions']]
 # Add images
for a in annotations:
 # print(a)
 # Get the x, y coordinaets of points of the polygons that make up
 # the outline of each object instance. There are stores in the
 # shape_attributes (see json format above)
            polygons = [r['shape_attributes'] for r in a['regions'].values()]
 # load_mask() needs the image size to convert polygons to masks.
 # Unfortunately, VIA doesn't include it in JSON, so we must read
 # the image. This is only managable since the dataset is tiny.
            image_path = os.path.join(dataset_dir, a['filename'])
            image = skimage.io.imread(image_path)
            height, width = image.shape[:2]
            self.add_image(
 "water", ## for a single class just add the name here
                image_id=a['filename'], # use file name as a unique image id
                path=image_path,
                width=width, height=height,
                polygons=polygons)
def load_mask(self, image_id):
 """Generate instance masks for an image.
       Returns:
        masks: A bool array of shape [height, width, instance count] with
            one mask per instance.
        class_ids: a 1D array of class IDs of the instance masks.
        """
 # If not a balloon dataset image, delegate to parent class.
        image_info = self.image_info[image_id]
if image_info["source"] != "water":
return super(self.__class__, self).load_mask(image_id)
 # Convert polygons to a bitmap mask of shape
 # [height, width, instance_count]
        info = self.image_info[image_id]
        mask = np.zeros([info["height"], info["width"], len(info["polygons"])],
                        dtype=np.uint8)
for i, p in enumerate(info["polygons"]):
 # Get indexes of pixels inside the polygon and set them to 1
            rr, cc = skimage.draw.polygon(p['all_points_y'], p['all_points_x'])
            mask[rr, cc, i] = 1
 # Return mask, and array of class IDs of each instance. Since we have
 # one class ID only, we return an array of 1s
return mask.astype(np.bool), np.ones([mask.shape[-1]], dtype=np.int32)
def image_reference(self, image_id):
 """Return the path of the image."""
        info = self.image_info[image_id]
if info["source"] == "water":
return info["path"]
else:
            super(self.__class__, self).image_reference(image_id)
def train(model):
 """Train the model."""
 # Training dataset.
    dataset_train = CustomDataset()
    dataset_train.load_custom(args.dataset, "train")
    dataset_train.prepare()
 # Validation dataset
    dataset_val = CustomDataset()
    dataset_val.load_custom(args.dataset, "val")
    dataset_val.prepare()
 # *** This training schedule is an example. Update to your needs ***
 # Since we're using a very small dataset, and starting from
 # COCO trained weights, we don't need to train too long. Also,
 # no need to train all layers, just the heads should do it.
print("Training network heads")
    model.train(dataset_train, dataset_val,
                learning_rate=config.LEARNING_RATE,
                epochs=10,
                layers='heads')
def color_splash(image, masks,N):
 """Apply color splash effect.
    image: RGB image [height, width, 3]
    mask: instance segmentation mask [height, width, instance count]
    Returns result image.
    """
 # Make a grayscale copy of the image. The grayscale copy still
 # has 3 RGB channels, though.
    gray = skimage.color.gray2rgb(skimage.color.rgb2gray(image)) * 255
 # We're treating all instances as one, so collapse the mask into one layer
    mask = (np.sum(masks, -1, keepdims=True) >= 1)
 #rgb red color
    color = (1.0,0.0,0.0)
 '''
    # Copy color pixels from the original color image where mask is set
    if mask.shape[0] > 0:
        splash = np.where(mask, (128,0,0), gray).astype(np.uint8)
    else:
        splash = gray
        '''
    masked_image = image.astype(np.uint32).copy()
for i in range(N):
        mask = masks[:, :, i]
        splash = visualize.apply_mask(gray, mask,color)
 #splash.astype(np.uint8)
return splash
def detect_and_color_splash(model, image_path=None, video_path=None):
assert image_path or video_path
 # Image or video?
if image_path:
 # Run model detection and generate the color splash effect
print("Running on {}".format(args.image))
 # Read image
        image = skimage.io.imread(args.image)
 # Detect objects
        r = model.detect([image], verbose=1)[0]
 # Number of instances
        N = r['rois'].shape[0]
print("\n*** instances to display :",N)
if N > 0:
 # Color splash
            splash = color_splash(image, r['masks'],N)
 # Save output
            file_name = "result/splash_{:%Y%m%dT%H%M%S}.png".format(datetime.datetime.now())
            skimage.io.imsave(file_name, splash)
print("Saved to ", file_name)
elif video_path:
import cv2
 # Video capture
        vcapture = cv2.VideoCapture(video_path)
        width = int(vcapture.get(cv2.CAP_PROP_FRAME_WIDTH))
        height = int(vcapture.get(cv2.CAP_PROP_FRAME_HEIGHT))
        fps = vcapture.get(cv2.CAP_PROP_FPS)
 # Define codec and create video writer
        file_name = "splash_{:%Y%m%dT%H%M%S}.avi".format(datetime.datetime.now())
        vwriter = cv2.VideoWriter(file_name,
                                  cv2.VideoWriter_fourcc(*'MJPG'),
                                  fps, (width, height))
        count = 0
        success = True
while success:
print("frame: ", count)
 # Read next image
            success, image = vcapture.read()
if success:
 # OpenCV returns images as BGR, convert to RGB
                image = image[..., ::-1]
 # Detect objects
                r = model.detect([image], verbose=0)[0]
 # Color splash
                splash = color_splash(image, r['masks'])
 # RGB -> BGR to save image to video
                splash = splash[..., ::-1]
 # Add image to video writer
                vwriter.write(splash)
                count += 1
        vwriter.release()
print("Saved to ", file_name)
############################################################
#  Training
############################################################
if __name__ == '__main__':
import argparse
 # Parse command line arguments
    parser = argparse.ArgumentParser(
        description='Train Mask R-CNN to detect custom class.')
    parser.add_argument("command",
                        metavar="<command>",
                        help="'train' or 'splash'")
    parser.add_argument('--dataset', required=False,
                        metavar="/path/to/custom/dataset/",
                        help='Directory of the custom dataset')
    parser.add_argument('--weights', required=True,
                        metavar="/path/to/weights.h5",
                        help="Path to weights .h5 file or 'coco'")
    parser.add_argument('--logs', required=False,
                        default=DEFAULT_LOGS_DIR,
                        metavar="/path/to/logs/",
                        help='Logs and checkpoints directory (default=logs/)')
    parser.add_argument('--image', required=False,
                        metavar="path or URL to image",
                        help='Image to apply the color splash effect on')
    parser.add_argument('--video', required=False,
                        metavar="path or URL to video",
                        help='Video to apply the color splash effect on')
    args = parser.parse_args()
 # Validate arguments
if args.command == "train":
assert args.dataset, "Argument --dataset is required for training"
elif args.command == "splash":
assert args.image or args.video,\
 "Provide --image or --video to apply color splash"
print("Weights: ", args.weights)
print("Dataset: ", args.dataset)
print("Logs: ", args.logs)
 # Configurations
if args.command == "train":
        config = CustomConfig()
else:
class InferenceConfig(CustomConfig):
 # Set batch size to 1 since we'll be running inference on
 # one image at a time. Batch size = GPU_COUNT * IMAGES_PER_GPU
            GPU_COUNT = 1
            IMAGES_PER_GPU = 1
        config = InferenceConfig()
    config.display()
 # Create model
if args.command == "train":
        model = modellib.MaskRCNN(mode="training", config=config,
                                  model_dir=args.logs)
else:
        model = modellib.MaskRCNN(mode="inference", config=config,
                                  model_dir=args.logs)
 # Select weights file to load
if args.weights.lower() == "coco":
        weights_path = COCO_WEIGHTS_PATH
 # Download weights file
if not os.path.exists(weights_path):
            utils.download_trained_weights(weights_path)
elif args.weights.lower() == "last":
 # Find last trained weights
        weights_path = model.find_last()[1]
elif args.weights.lower() == "imagenet":
 # Start from ImageNet trained weights
        weights_path = model.get_imagenet_weights()
else:
        weights_path = args.weights
 # Load weights
print("Loading weights ", weights_path)
if args.weights.lower() == "coco":
 # Exclude the last layers because they require a matching
 # number of classes
        model.load_weights(weights_path, by_name=True, exclude=[
 "mrcnn_class_logits", "mrcnn_bbox_fc",
 "mrcnn_bbox", "mrcnn_mask"])
else:
        model.load_weights(weights_path, by_name=True)
 # Train or evaluate
if args.command == "train":
        train(model)
elif args.command == "splash":
        detect_and_color_splash(model, image_path=args.image,
                                video_path=args.video)
else:
print("'{}' is not recognized. "
 "Use 'train' or 'splash'".format(args.command))
在图像上运行模型并进行预测
custom_roadwater.py 中的color_spash内容我们做了修改,所有的实例instance 都用同一种颜色mask处理。
预测指令:
python3 custom_roadwater.py splash --image=customImages/test/bitauto.jpg --weights=mask_rcnn_damage_0010.h5
另外使用ffmeg将图片转换成GIF 。
ffmpeg -r 2 -i %d.png 11.gif -y
-r 2 一秒2帧
-y 覆盖原来
预测有一定的误差和丢失。也许可以通过加大训练集增加准确率。
感谢
非常感谢 Matterport 在GitHub上开放的源码,同时也感谢priya 分享的详细博客https://www.analyticsvidhya.com/blog/2018/07/building-mask-r-cnn-model-detecting-damage-cars-python/ 。


评论(0)
您还未登录,请登录后发表或查看评论